In this series the main focus was to build an simple pascal interpreter by python which can execute simple pascal codes like mathematical operations and procedure calling. This series introduced me lots of thing like scanner, token, parser, interpreter and grammar, etc. At first I was thinking that I will not be able to complete the series properly as I didn’t know anything about interpreter and compiler but as move forward in this series things get cleared because everything was elaborated properly. Whenever I stuck at any point I search it in the internet and try to find the proper solution. For me in this series the most interesting part was the grammar of any programming language and how they help.
In this series I also learned how to write better commits so people can understand my code and also learned how to reset my commit to previous commit when I commit wrong things or made any bad commit message. Here you can see my commits.
I was reading this part of the pym book and thought that I should change this code a little bit so that it can do some better thing like instead of storing the content in a text file it stores it in a HTML file and it also checks if there is any same named file exists in the directory or not. Here is the code –
import os.path
import requests

def download(url):
    """
    Download the given url and saves it to the current directory
    :arg url: URL of the file to be downloaded.
    """
    req = requests.get(url)
    if req.status_code == 404:
        print('No such file found at %s' % url)
        return
    fileName = url.split('/')[-1].split('.')[0] + '.html'
    print(fileName)
    if os.path.isfile(fileName):
        print('Same file name already exist')
    else:
        with open(fileName, 'wb') as fobj:
            fobj.write(req.content)
        print('Download over')

if __name__ == "__main__":
    url = input("Enter a URL: ")
    download(url)
Above we are getting the content of the content of the url by requests.get(url) method. Then checking if that url is valid or not. If valid then parsing the url by split() method like first we are splitting it by “/” and taking the last value of the list and then splitting it again with “.” and taking the first value of the list. Then checking if there is no same name file exist and if there is no same name file then we are creating a file then writing the content in the file. Thank you 🙂
I started learning python back in 2017 and since then I am still learning it and using it and almost everyday I write some python code. Python is an interpreter based language, you can write the code directly in the interpreter or in a separate file(extension is .py) and run it.
Using the interpreter
Fire up your terminal and type python3. And you will see something like this below code snippet.
$ python3
Python 3.6.8 (default, Jan 14 2019, 11:02:34)
[GCC 8.0.1 20180414 (experimental) [trunk revision 259383]] on linux
Type "help", "copyright", "credits" or "license" for more information.
>>>
Now we are going to print “Hello World!” using the interpreter.
>>> print("Hello World!")
Hello World!
Using a source file
Create a file called helloWorld.py and enter the following text:
print("Hello World!")
We can run this file by python3 command.
$ python3 helloWorld.py
Hello World!
Whitespaces and indentation
Language like c/c++ use pair of curly brackets to divide different identifiers. In the python it uses indentation for that. The whitespaces at the beginning of the line is known as indentation. If you give wrong whitespaces then it will give you errors. Python use 4 whitespaces for a single indentation. Below there is an example.
>>> a = "Aniruddha"
>>>  b = "Basak"
  File "<stdin>", line 1
    b = "Basak"
    ^
IndentationError: unexpected indent
Comments
Comment is a line in python that will start with # and the interpreter of python will just ignores the lines. You can write anything here to describe your code.
>>> # This is a comment
>>> # The next line will multiply two numbers
>>> a = 12 * 34
>>> print(a) # Printing the value of a
If your description is long then it is recommended that you use multiline comments. There is two options for that.
# This is option 1
# Multiline comment
"""
This is option 2
Multiline comment
"""
Modules
The reason why python is loved by so many people is it gives so many modules to work on almost everything you can imagine. Basically modules are python files that contains different functions classes and variable that you can reuse.
>>> import os
>>> print(os.name)
posix
Keywords and Identifiers
Below the following identifiers are main keywords of python. They must exactly types as it is.
False      class      finally    is         return
None       continue   for        lambda     try
True       def        from       nonlocal   while
and        del        global     not        with
as         elif       if         or         yield
assert     else       import     pass
break      except     in         raise
Variables and Datatypes
In python we don’t specify the type of the variable while declaring it.If we declare a = 1 then a will become an integer type and if we define b = "Hii" then b will become an string type variable.
>>> a = "Hi "
>>> b = "how you doing?"
>>> a + b
'Hi how you doing?'
Taking input from keyboard
We can take input from users while executing the program. We can use the input() function given by python for this. Let’s see an example of taking input from user.
number = int(input("Enter number: "))
print(number)
Here is the result –
$ python3 input.py
Enter number: 25
25
Operators and Expressions
Python language supports the following types of operators.
Arithmetic Operators
Comparison (Relational) Operators
Assignment Operators
Logical Operators
Bitwise Operators
Membership Operators
Identity Operators
Arithmetic operator:
It is used to perform common mathematical operations.
>>> a = 2
>>> b = 4
>>> a + b
6
>>> a - b
-2
>>> a * b
8
>>> a / b
0.5
>>> a % b
2
>>> a ** b
16
>>> a // b
0
Comparison operator:
It is used for comparing two values and returns either True or False.
>>> a = 2
>>> b = 4
>>> a == b
False
>>> a != b
True
>>> a > b
False
>>> a < b
True
>>> a >= b
False
>>> a <= b
True
Assignment operator:
This operator is used to assign values to some variable.
>>> x = 5
>>> x += 5
>>> x -= 5
>>> x *= 5
>>> x /= 5
Logical operators:
Logical operators are the and, or, not operators.
>>> x = True
>>> y = False
>>> print('x and y is ', x and y)
x and y is  False
>>> print('x or y is', x or y)
x or y is True
>>> print('not x is', not x)
not x is False
Bitwise operators:
Bitwise operator works on bits and performs bit by bit operation. Assume if a = 60 and b = 13. Now in binary format they will be as follows –
>>> a = 60
>>> b = 30
>>> a & b
28
>>> a | b
62
>>> a ^ b
34
>>> ~a
-61
>>> a >> 2
15
>>> a << 2
240
Membership Operators:
Python’s membership operators test for membership in a sequence, such as strings, lists, or tuples. There are two membership operators as explained below −
a = 'Hello World'
print('H' in a)
Identity Operator:
Identity operators compare the memory locations of two objects. There are two Identity operators explained below −
>>> a = 5
>>> b = 5
>>> c = 10
>>> print(a is not b)
False
>>> print(a is b)
True
>>> print(a is c)
False
Pull request let you tell others about changes you’ve pushed to a github repository. Once a pull request is sent, the maintainers of that project can review the changes and discuss for modifications, and even push commits if necessary and once everything is ok they can accept that pull request and all your changes will be merged with the upstream project. Below there are set of instructions that will describe how to create pull request.
The first step should be creating a copy of a repository. You can fork a repository on GitHub by navigating with your browser to the GitHub URL of the open-source project you would like to contribute to.
GitHub repository URL contains both the username of the owner of the repository and the name of the repository. For example, below github url aniruddha2000 is the username and the hello-world is the name of the repository.
https://github.com/aniruddha2000/hello-world
When you go to that url on your browser you will see a “Fork” button on your upper right hand side of the page.
Click the fork button and start the forking process.
Once the process is done, your browser will go to a screen similar to the repository image above, except that at the top you will see your username before the repository name, and in the URL you will see your username before the repository name.
https://github.com/your-username/hello-world
Clone the forked repository
Now you have to clone the repository in your local machine that you have forked. In order to do that you have to use git clone command. Execute below command in your terminal.
Whenever you work on a collaborative project you and other programmers contribute to the repository will have different ideas for new features or fixes. So it is recommended that you should always work on a new branch and make pull request to the upstream project from that branch and this process will help you to work nicely will all contributors. Execute below command to create a new branch.
$ git checkout -b new-branch
Switched to branch 'new-branch'
Make changes locally
Once you have modified all necessary files you should add them git add and commit by git commit -m. After committing you have to push the changes in the ‘new-branch’. Execute below command for this operation.
$ git push origin new-branch
Create Pull Request
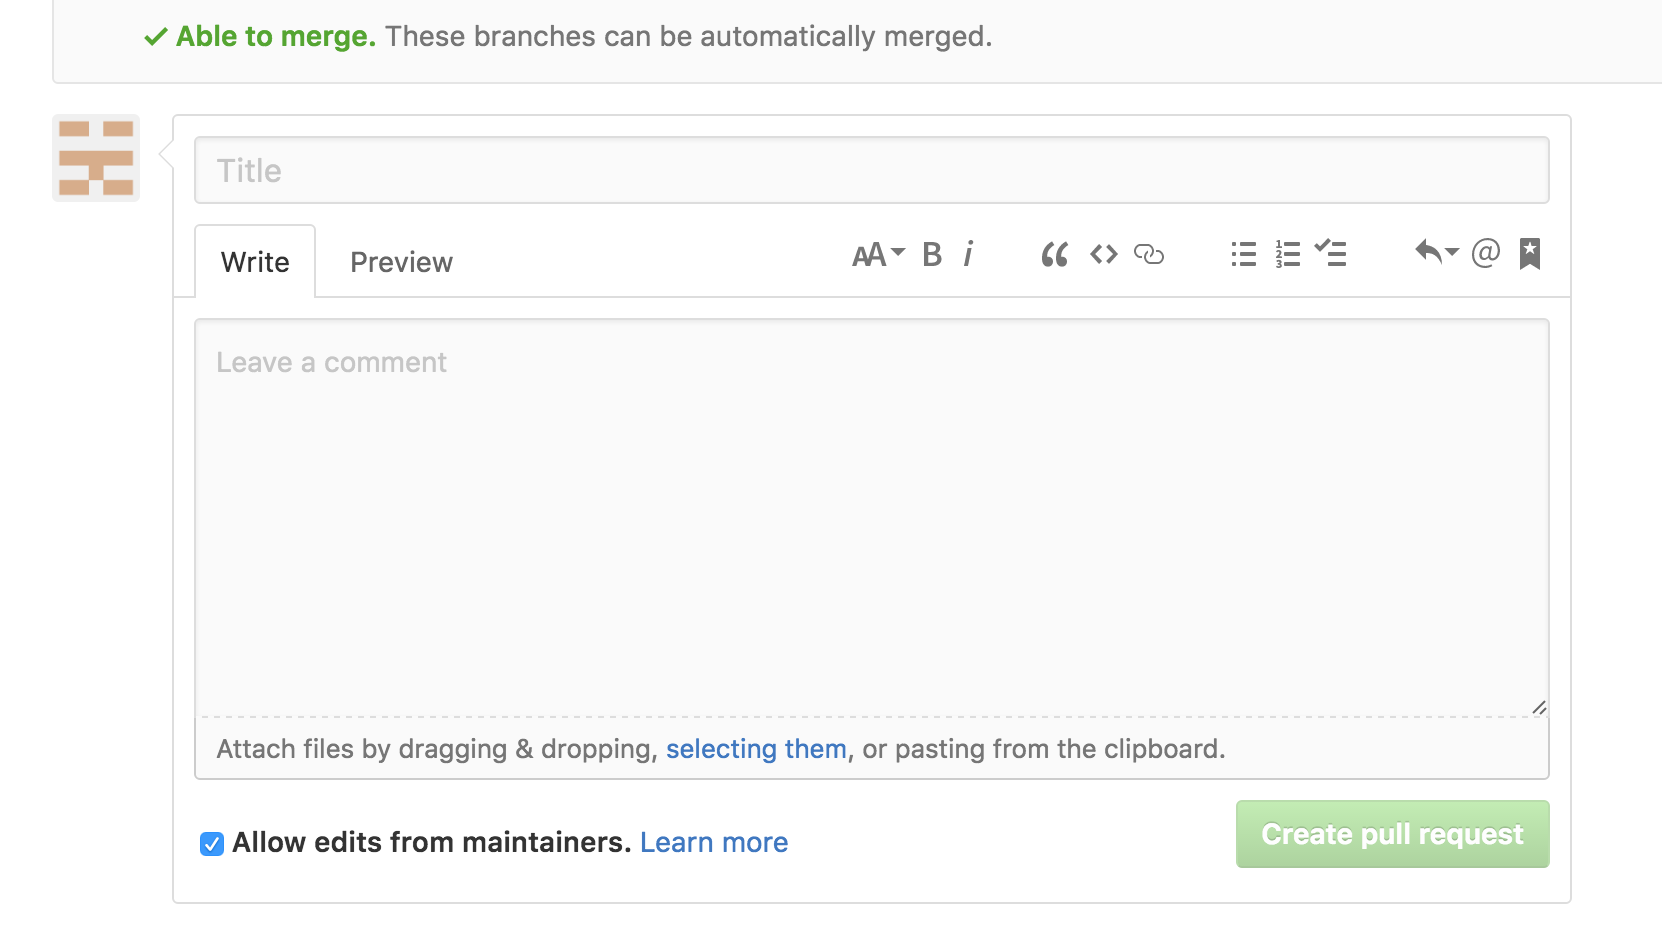
Now you can create a pull request to the upstream project. You can navigate to your forked repository and click the “New pull request”.
Once you have chosen, for example, the master branch of the original repository on the left-hand side, and the new-branch of your forked repository of the right-hand side, you should see a screen that looks like this:
Add the necessary comment and then click the “Create pull request” button. Now go the pull request section of the upstream repository and you will see your pull request is there.